Tuesday 9 September 2014

Cut down in it's prime . .

Following on from my post on the Cinelli and it's loose headset I am pleased to report that both my problems have been solved with the cutting down of the fork steerer.

For a very reasonable £12 Peason Cycles Sheen cut off the offending material and not only does the bike look finished now, the headset could be tightened correctly and there is no sign of the previous clicking or moving that I found.  I was so pleased with the price I rode the road bike there to collect the Cinelli and had that done the next day.

Full pictures of the bike to follow when I write it up properly in a long overdue "my bikes" section, but here's a photo of the now neat and cut back steerer.

The weight saving should have a few seconds off my commute right yeah . . 

Cinelli Single Speed - Cut Down Steerer


Monday 28 July 2014

Where's your headset at . .

Commuting on the single speed cinelli has been a maintenance free experience this summer - partly thanks to the roasting sunshine the UK is currently enjoying, but after a recent downpour I felt that the headset had come a little loose.  After checking and setting the headset several times (instructions from Park Tool can be found in the link below) the problem got slightly better but wouldn't go away.

After some internet and book research a common cause was dirt or grit entering the assembly preventing it from tightening properly, probably during the rain.  Other than a failed or worn bearing there didn't seem to be many other candidates for the cause.  As the bike had been built for about 18 months, and probably covered 7/800km, dirt seemed the most likely candidate, and a strip down, clean and re-grease would remove most possibilities. 

The ever excellent Park Tool website has detailed instructions for removal, re-fitting and setting of thread less headsets, and their article can be found here:

http://www.parktool.com/blog/repair-help/threadless-headset-service

I started off by removing the front wheel and the front brake from the fork, slotting the handlebars into the bottle cage to keep them out of the way.


Cinelli Bootleg Mystic with fork and handlebars removed
Next I removed the headset bearings and cleaned all the relevant parts, working over a towel meant if any of the balls from the ball bearings made a break for it they couldn't get far, and they show up well against green.


Fork with front brake removed and both the upper and lower bearing races
Upon inspection the parts were in good condition but dirt was present, and the old grease was very dirty around the outer of the bearing races and where they contacted the frame and the fork.  The bearings themselves had cleaner grease on them and both they and the races were in perfect condition.  I used wet wipes (baby wipes) to clean the relevant parts, ideally I would have preferred to rinse and clean them in a solvent bath but this wasn't possible.  I also gave the bearing cups and the frame a good wipe over to remove any dirt or old grease.


Cleaned upper bearing parts


Cleaned headset cups and steerer tube
I then turned to my trusty tube of Finish Line Dupont Teflon bearing grease - this has been with me for many years and is excellent stuff for bearing services such as this one.  It is now almost done so I will be sourcing a new bottle when I next do some bike bits shopping, a link can be found below for Chainreaction Cycles.

http://www.chainreactioncycles.com/finish-line-teflon-grease/rp-prod980

This was applied to the internal races and the bearings themselves, with a small flat blade screwdriver used to push the grease into the hard to reach areas.  Once well greased the parts were snapped back together and the bearing assembly was ready to be re-insterted in to the bearing cups and the bike re-assembled.


Greased and re-assembled upper bearing parts
The bike was then put together and the process for tightning the headset from the Park Tools link followed.  The headset itself felt smooth and tight while turning, but here was still some play when locking the front brake and pushing back and forth.  This lead me to the conclusion that there isn't enough of a gap between the top of the fork steerer and the spacers/stem which the top cap presses against.  

This enables me to hit two birds with one stone (has anyone ever actually done that?) as the steerer has needed cutting down for a while.  Much to my good buddy Russ T's disgust I have previously shied away from cutting down fork steerers for two very good reasons; 1 - I might sell the bike, 2 - I might mess it up and cut off too much.  However, aesthetically I do hate that bit of steerer and spacers sticking out the top and now was the time to get rid.  So this is a job for the LBS (Local Bike Shop).  While I now do most jobs myself I've always believed you should support your local shop, and days like these are proof why everyone should.  

My local shop is Pearson Cycles in East Sheen, I ride past there regularly going to Richmond Park or further afield and aside from some very nice machines and tasty coffee, they have very helpful staff and excellent mechanics.  I have previously stopped in to borrow a torque wrench for a slipped saddle, and had an errant wheel trued and their service has been top notch.  

So the bike has been dropped off and I eagerly await her return, both to see if the headset is fixed, and to see what she looks like without that ugly bit of steerer sticking out the top.   

Peasrson Cycles can be found online here, and in addition to being an excellent bike shop, they are also the oldest in the world so well worth a look:

http://www.pearsoncycles.co.uk


Saturday 19 July 2014

XC Racer - BB30 Bolt Replacement

During the Whyte 20-CS xc racer build I mentioned that the self extracting bolt looked like it might be damaged and this did indeed turn out to be the case.  When I started to tighten the cranks up to the specified torque the effort dropped off suddenly and it was clear the bolt had pulled through the crank arm. 

The bolt in question can be seen in the diagram below, which is taken from the FSA BB30 Installation manual and can be found at the link below:

https://www.bike-components.de/bedienungsanleitungen/2011/fsa/atb/mtb_bb30_detailed_instructions.pdf

Exploded diagram of the cranks from the FSA Installation Instructions

The self extracting bolt, or BB30 Crank Bolt as FSA refer to it in the figure above, is top hat in section, and the brim of the top hat was the area that had failed.  Usually this type of bolt is steel but this FSA version is a very lightweight alloy, something like ZAMAK, which is light and dimensionally accurate as a material but has a high air content and prone to crumbling, which had happened in this instance.  The Bolt has a 10mm Allen head and the top hat section contacts the crank arm and drives it along the splines of the spindle as the bolt is rotated.  This part was most likely over-torqued causing the in-expensive bolt to fail rather than the much more expensive crank arm.

The old bolt can be seen below on the left next to the new replacement bolt.


The replacement bolt was bought from Triton Cycles, link below.

http://www.tritoncycles.co.uk/components-c9/crank-spares-c186/fsa-bb30-crank-bolt-p5253

Tuesday 15 July 2014

XC Racer - the Reveal

The bike is finished, well a bike is rarely ever finished so more accurately, the build is finished.

Jobs left to do are tune the gears, setting the air in the forks and re-mounting the tyres tubeless.  Once those tasks are done I will get out and report back on the ride, but for now here are some pictures and the final spec.


I've always preferred a smaller bike so plenty of seatpin is great for me

Whyte did a brilliant job with the colour scheme - love red white and black on a bike

This shot just makes me want to jump on and hit the dirt

The bars, grips, stem and XX levers go well with the frame and forks

The fork decals are definitely more orange but it works

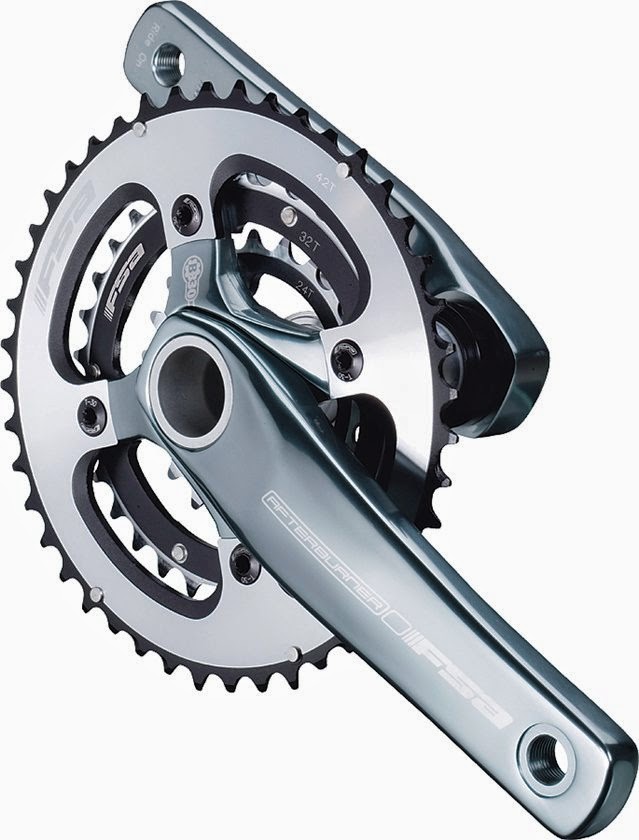
They were totally budget driven - but the cranks suit the bike well
I would have preferred SRAM but as ever the Shimano kit fits well and works perfectly

Rocket Ron - the "do it all" UK tyre choice

Big beefy bottom bracket area and BB30 crank bearings

From a different era - but the Bontrager Race Lite wheels look great

Love the XX brakes - look the business and super light
Not usually a fan of factory finishing kit but Whyte have done a great job on the stem
So far it looks super fast, I'm really pleased with it and it definitely looks the business - which passes my first test criteria.  From a few pedals around the car park the brakes feel super grabby and the ride is really nimble - I can't wait to show it some trails and see how she performs on some proper single track.  

Build Spec

Frame: 2012 Whyte 20-CS Full Carbon Uni-directional Multi Monoque, full carbon dropouts
Forks: RockShox SID RLT, 100mm Travel, Remote Poploc
Bars: Race Face XC Low Rise
Stem: Whyte Custom70mm
Headset: FSA Integrated, Orbit ZS Plus, 1 1/8" - 1 1/2" Sealed Cartridge Bearing
Grips: Prologo Feather Lock-on White

Front Brake Lever: SRAM XX
Front Caliper: SRAM XX
Front Disc: Avid HSX 180mm
Rear Brake Lever: SRAM XX
Rear Caliper: SRAM XX
Rear Disc: Avid HSX 160mm

Shifters: Shimano SLX 3 x 9
Cables: Clarks Sealed
Front Mech: Shimano XT
Rear Mech: Shimano XT

Saddle: Selle Italia X1
Seat Post: Whyte Custom 2014 Alloy, 27.2mm x 400mm, 2 bolt clamp
Seat Post Clamp: Whyte

Cranks: FSA Afterburner BB30 175
Chainring(s): FSA Afterburner BB30
Chain: KMC X10SL-Gold
Cassette: Shimano SLX
Pedals: Shimano M-520 SPD
Bottom Bracket: FSA Afterburner BB30

Wheelset: Bontrager Race Lite DT Swiss Onyx Hubs
Tubes: Continental
Tyres: Schwalbe Rocket Ron Evo 

Accessories: 
None (yet)

Weight: sub 11kg (est)


Project XC Racer - Cable Routing

Building the Whyte 20-CS went pretty easily, but the one thing I tangled myself up a bit with was the gear cable routing.  The first thing to stump me was the cable brackets themselves.  As fitted to the frame when I received it (admittedly second hand) they have a wider diameter on the RHS (Right Hand Side) of the bike (LHS as viewed from the front of the bike).  The second was which side the cables should run, the convention would be the rear deraillieur cable down the left to allow a nice smooth curve to the cable from the right hand shifter, and vice versa for the front dérailleur - but at first look this wouldn't work.  As I bought the frame used, I decided to crack on and try to figure these things out for myself.

My first thought was that the wider diameter clamp was for the rear brake as the hydraulic line has a wider diameter, however I quickly ruled this out as the rear brake has it's own dedicated run underneath the down tube, and with the rear calliper mount between the chainstay it couldn't run any other way.  My final thought on the bracket was that it had been designed this way to allow a 1 x 10 set up with the vacated clamp for the front dérailleur used to run the hydraulic line for a dropper post. 

For the gear cable routing, the conventional routing made the curve around the seat tube for the front dérailleur very tight.  I had researched lots of images, as well as the Whyte 2012 catalogue to see what other bikes were built with.  Though there aren't too many Whyte 20-C's out there, I found several examples but even across the range in the catalogue from Whyte, there wasn't a consistent majority for any one set up.

What I found to suit the frame best was running the front deraillieur cable down the RHS of the bike and the rear deraillier down the LHS with a crossover between the second and third clamps and both cables running round the RHS of the seatpost.  This can be seen in the image from the Whyte 2012 20-C page on the Whyte website.

http://whyte.bike/2012/bike_page.php?ModNo=W-1-008-12


Whyte 20-CS Cable Routing

Whyte 20-C Cable Routing

Conventional Routing but with both cables on the RHS of the seat tube

Whyte 20-CS Cable Routing
Whyte 20-C Routing and Preferred Option
For now I am going to go with the routing from the 20-C on the Whyte website, but will see if I can contact Whyte or one of their distributors to see if they can help.

Monday 14 July 2014

XC Racer Part IV - the Build


With all the bits in stock and some optional extras added all was ready for the build.  First in was the seatpost so that the frame could then be mounted on my workstand.  I'm a big fan of Park Tools and Topeak, and while I looked at and tried several workstands, the Topeak PrepStand™ Elite was the model I chose, it's well built, easy to use, super strong and works well on rough surfaces.


Topeak PrepStand™ Elite

http://www.topeak.com/products/Repair-Stands/prepstandelite

Once mounted I could get the crankset installed, this being my first experience of BB30 I did my homework, I'd bought my crankset on eBay so found the installation instructions online.  All was simple enough, particularly as the bearings were already pressed into the frame so the remaining installation was similar to Shimano Hollowtech II and Sram Mega Exo external type bearings.

If you are looking for instructions for installation those for the FSA Afterburner BB30 cranks can be found here:

https://www.bike-components.de/bedienungsanleitungen/2011/fsa/atb/mtb_bb30_detailed_instructions.pdf

During installation I noted that the captive nut that fixes the left hand crank arm onto the spindle looked worn or damaged with much of the flat "top had" section crumbled away so only loosely tightened this up.  I continued work as I would not be riding the bike straight away but made a note to check this when I tightened up the crankset to the correct torque setting.


Frame mounted in the workstand


BB30 Afterburner Cranks Fitted
Please excuse the glamorous location - with a very young baby you take your chances to make workshop space and time where you can!

Next I fitted the forks, stem and handlebars - fortunately the headset bearings were also already pressed in so this was simply a case of fitting enough spacers and tightening everything up.  I fitted the spacers under the stem for now, I'll sort the geometry once the bike is finished.  Next to go on were the brakes, my original plan was to run a 160mm disc up front and a 140mm on the rear to keep things lightweight and as I would expect that to be enough power with the XX brakes.  After checking the rear brake mount is 160mm minimum, and as I only had one of each size of disc, I went for 180mm front with a 20mm caliper spacer and 160mm rear.


Front brake lever fitted - grey marks on the bars wipe off
Rear brake lever, front shifter and Poplock Control
Front Brake with 20mm calliper spacer and 180mm disc
Rear brake with calliper mount inside chain and seat stay and 160mm disc
While fitting the brake discs I also prepared the wheels by fitting the cassette and the tyres.  Once complete I will be running the tyres tubeless but to get the bike rolling and help seat the tubeless tyres I removed the tubeless valves and fitted the Schwalbe Rocket Ron's with a pair of Continental tubes and inflated them to the maximum 50psi to fit the bead tightly to the rim, this will help seat the tyres when I fit them tubeless.

Next came the gears, I picked up a set of Clark's sealed inner and outer cables, mounted the shifters and rear dérailleur and ran into my second concern.  The SLX front dérailleur I had in stock from my old groupset was a low mount type, and the form of the seat tube where it meets the bottom bracket area of the frame is much wider than on a conventional tubed frame and this type of dérailleur simply won't fit.

Some time on eBay showed that there wasn't much to be saved going used and with an XT rear mech already installed I managed to find an XT front mech for £17.25 from High Altitude Bikes.


Shimano FD-M771 Front Derailieur
http://cgi.ebay.co.uk/ws/eBayISAPI.dll?ViewItem&item=360969468350

The new front mech fitted very easily, following the installation instructions for the torque on the clamp bolt, aligning the cage to be parallel to the chainrings and ensuring that the outer cage plate was 1mm above the big chainring teeth.


Front Dérailleur Fitted
Rear Dérailleur
With the deraillieurs fitted it was time to run the cables, fit the handlebar grips, set all the handlebar controls to the correct angle and spacing.  For angle the general consensus is that the line of your forearm should line through the brake levers when viewed from the side.  For the grips, shifters and PopLock lever I followed the manufacturers recommendations and my own preference for look.

Last but not least were the pedals which are Shimano entry level SPD and get some pictures of the finished result in all it's glory.

I'll save those for a final reveal with all the build spec.

Friday 11 July 2014

More Single Speed Commuting . .

So it's been a while since I posted about life commuting and an office move for my company meant that direct comparison between my first few commutes with gears was not possible.  We are now settled in the new office and I've been doing two or three commutes a day, which I'm really enjoying, particularly as I'm starting to get some reasonable fitness.  The even newer commute is just over 26km over almost the same route, which is pretty flat but largely free flowing and mostly traffic free.  

My previous goal was to get the single speed time down to the original time that I did on the geared road bike, which I aim to do again for this new commute, but I may have made a rod for my own back.  After several rides on the single speed I rode the road bike last Wednesday in preparation for heading up to Yorkshire to watch Le Tour and have a crack at Stage 1.  My best on the single speed on the new route was 58:36 as can be seen in the Strava link below:

http://www.strava.com/activities/163438601

The time recorded on the road bike was 52:53 as can be seen here:

http://www.strava.com/activities/160996301

The single speed is real hard to keep at high speed but I all too often ease off and coast which is probably why a lot of pro riders incorporate some fixed single speed riding into their training, but for safety I run the single speed with a freewheel as London presents a lot of hazards.  So I will really have to push myself to try and get that time down - and then see if I can go quicker again on the geared road bike.

This is going to wreck my legs, but with a twelve week old baby I can't join a club, race or train specifically so this is the best way to get some sport and have a target to focus on.  

I'll check back in on this in a month with my success/failure* . . 

*delete as applicable


Saturday 21 June 2014

XC racer Part III - Optional Extras

With most of the bits in stock, my attention wandered to tyres, Rocket Rons in particular as I didn’t have a decent all rounder tyre in stock and again, Pinkbike came up trumps.  Though I originally saw the ad on Bikeradar, I was too new to pm the seller but the tyres were also advertised on Pinkbike so I made contact through their messaging system.  The Seller was someone I had seen posting on Bikeradar, and had recently broken up his HT as he rides road now.  I almost bought his Focus Raven and the nearly new Rocket Rons that he had on the bike would be perfect for me, £30 delivered was the price agreed, half the price of a single tyre new, and with some elbow grease cleaning them up they now look practically new. 


The plan for the cranks then took a lucky turn via eBay.  I had been keeping an eye out for a set of BB30 cranks that would come in under the budget for the adapters to run my HTII cranks, which would free them up for another build that needs them.  I hadn’t expected to get anything for that, but a set of FSA Afterburner cranks came up, these are a triple BB30 but 9 speed - something of a rarity as everyone is 10 speed and most people want a double or even a single.  This also got me thinking about 1x9 so I did some research, and this is a possibility for the future.


FSA Stock Image from CRC 


Actual Part


The FSA Afterburner Cranks were had for a pretty amazing £5 starting bid plus £7 postage.  This almost never happens to me, so the saving on adapters will help the budget, and may free up enough cash for a narrow wide chainring for a 1x9 set up.  Condition was excellent, they have been used and there are heel rub marks on the arms that have removed the lacquer  but the teeth are in very good condition.

So with all the new bits delivered I just have to dig the parts out of my storage unit and get the bike built.  With a one month old baby getting creative with ways to occupy my free time this may take a while so keep checking back and I will update as I go along.  

You can also see more pictures and bike stuff on my twitter page @jamescycles 


Thursday 19 June 2014

XC Racer Part II - The Bits


With the frame and forks secured, the hunt was now on for the rest of the components needed.  I spotted a well used but functioning set of Avid XX brakes with plenty of spares and three discs, 140, 160 and 180mm for sale on Pinkbike.  Again a few offers went back and forth before I secured the lot for £105.  The discs weren’t what I was after originally, but I decided running 160/140 would be enough for XC and nice and light, with the option to switch to 180/160 for trail centre action.


AVID Image


The Actual Brakes


Next I wanted a saddle, I have Selle italia SLR Flow saddles on all my bikes, but even used on eBay they were going to blow my budget as the cheapest reasonable examples are generally going for £50 or more.  After some thinking on the problem I came across the Cube X1 Ergo - which is a saddle made for Cube by Selle Italia - the dimensions are very close to the SLR and about 130g more which I can cope with.  New the X1 can be had for £35 on discount at CRC but I then spotted one on the Bikeradar Road Bike Classifieds for £18 delivered.  


Next I needed bars - my preference was low rise carbon 650mm, but like the saddle - they were proving hard to find on my budget (£30).  Up stepped the ever dependable Merlin Cycles who were offering the Race Face Deus XC at half price for £29.99 with free delivery.  


Next on the shopping list were grips, I liked the idea of some super light foam grips, especially as they are about 100g lighter than lock on grips so would get me back what I’d lost on the saddle, but there seem to be lots of report of them sliding around.  Then I spotted the Prologo Feather lock on grips - they are lightweight foam and lock-on, but with only a single set of lock collars they weigh 60g so a good compromise.


The final items were less fun but required none the less, first off was BB adapters to allow me to run my Hollowtech II cranks with the BB30 that is already fitted to the frame.  My budget wouldn’t run to new cranks, and I didn’t want to remove the perfectly good BB30 to press in an adapter so I opted for these Wheels Engineering shims for £29.99.  They allow the 24mm spindle Hollowtech II cranks to be fitted to the 30mm bearing of the BB30.


So the orders were placed and the parts started rolling in, next I'd need to find some time to build the bike . . 


Wednesday 18 June 2014

XC Racer Part I - the Frame


I decided to focus on getting the frame first as that would then dictate the forks etc.  After many months of scouring forum classifieds, eBay, Gumtree, Pinkbike and the like, I spotted a very good condition Whyte 20-CS on the Pinkbike Classifieds.  The owner was also selling the Rock Shox SID’s that came with the frame, the seat post and stem.  So we had a little bit of offering back and forth before we settled on £500 for the lot, with a very helpful mate of mine who lived near the seller collecting for me.

I had done plenty of research before finally pushing the button and Whyte are an exciting British brand led by Chief Designer Ian Alexander.  They have a wide range of bikes based around trail and cross country racing.  Their range is now based around 29 inch wheel bikes but the 2012 20-CS was one of their last 26 inch wheeled bikes.  

Full info on the 20-CS can be seen here:


With the current 2014 range of Whyte bikes seen here:


Once back at home the frame looks great and I am super keen to source the rest of the bits and get this little cracker built.


Friday 6 June 2014

Commuting in one gear . .

I changed jobs in November last year resulting in a commute that is a nice 28km from West London to Addlestone in Surrey.  Scything through Twickenham, Little Hampton, Hampton Court and Weybridge the route has a mix of busy main roads and nice quiet lanes.  Getting up to speed on the new job I have spent a lot of time out of the office on site ,but with the summer coming and better weather I'll be in the office more, and leaving the car at home more often.

From my four rides to work in 2014, this is the Strava link for my fastest time this year so far:

http://www.strava.com/activities/147054683

That was done on my Viner road bike with the use of 20 gears.  I have a single speed Cinelli that was originally bought as a winter training bike but, with a round trip of almost 60km, this will now come into service as my commuter to save the wear and tear on the Viner.

Today was my first ride in.  

My legs definitely felt the difference, having to spin at a much higher cadence to keep up a reasonable speed on the flat.  Sadly (for my training ambitions) there aren't any real hills on the route, so there is a lot of time spent around the 30kph mark and the legs get a fast working over.

The time was four/five minutes longer so my goal for this summer is to get that down to the same time as the geared bike.  What will be interesting will be if I do manage that will be to then see if there has been any change in my speed back on the Viner.

I have made some Strava segments on the longest junction free sections to help motivate myself and compare the pure riding elements of the ride, as traffic can change the overall time quite a bit.

The Segments are here:

http://www.strava.com/athlete/segments/created

I'll update with the Strava links for today's efforts and report what's left of the legs after the return journey . . 

Wednesday 4 June 2014

XC Racer on a budget . .


After several years racing XC and Enduro (FNSS, Gorrick etc) my trusty Gary Fisher Ziggurat race bike got pinched along with almost all my other bikes in a daring raid on the sheds in my back garden.  After after climbing along a set of garages, scaling five of my neighbours' eight foot fences the thieves got to my back garden, cropped the locks off my two sheds to help themselves to three MTB’s and two carbon road bikes - the only survivor being my 1994 Kona AA that was in bits for a re-build. 

Fortunately they gave up on the road bikes five gardens down and left them in a neighbour’s garden, they called the Police and the bikes were returned the next day.  By the time the insurance company paid out for the other bikes (M&S - excellent service) I was in the process of moving house from Northampton to London and had been doing more road riding, so I decided to take the payout and plough the cash into the house. 

Eighteen months later I’ve been really missing racing and getting out in the woods with my mates, so the hunt started for a new mountain bike. I had been steadily saving up some cash, and set myself a budget of £750 to get a bike together. I also had my “spares” to help soften the blow, sadly my “good” wheels were on the Zigg but I had a second set of Bontrager Race Lite wheels with Mud tyres on for bad weather and winter riding, along with a Race XXX Lite seat post, Shimano SLX Groupset, some SPD pedals and an assortment of tyres, tubes and Stan’s sealant.

I wanted something fast and light, but still a bit trail orientated so I could also hit the trail centres and woods for fun.  The Zigg had been perfect for that so I had the geometry and data from my Retul bike fit to work with while looking for a similar bike.  Ideally I wanted a carbon frame (mainly as I haven’t had a carbon mtb before) and 100mm forks with the preference being Fox and 100mm - F100 RLC or similar.  Brake wise I had Avid Juicy 7’s before and had 160mm discs on my wheels, so something Avid was the way I wanted to go.  

On the hunt several bikes looked to be what I was after; On-One Whippet, Trek 8 or 9 Series, Focus Raven, and I also had an eye out for another Ziggurat or similar Genesis Frame to build up.

Component wise my spares left me needing:

Handlebars
Saddle
Grips
Stem
Brakes (160mm discs already in stock)

After looking at my tyres they were all in various stages of wear, so some Rocket Rons would also be nice if the budget would allow.

The hunt was on . .